In this scenario we will be adding a Windows Client and then back it up using BCenter. The steps involved in this process include: installing a File Daemon, configuring a Windows system for backup jobs, and running a backup job. This scenario delivers step-by-step guidance on how to install and configure a File Daemon on a single Windows system. It is important to note that most customers will have multiple Windows systems, and there are automation tools available for such cases. If you experience any connection issues with the Client in this scenario, refer to “Testing Client Connectivity” to fix the issue.
Installing File Daemon
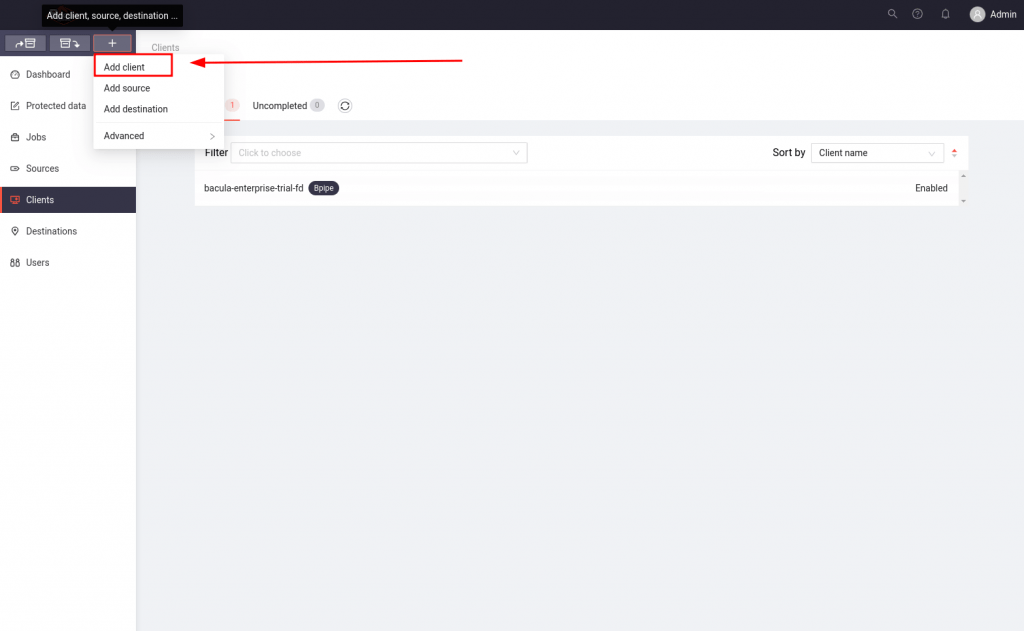
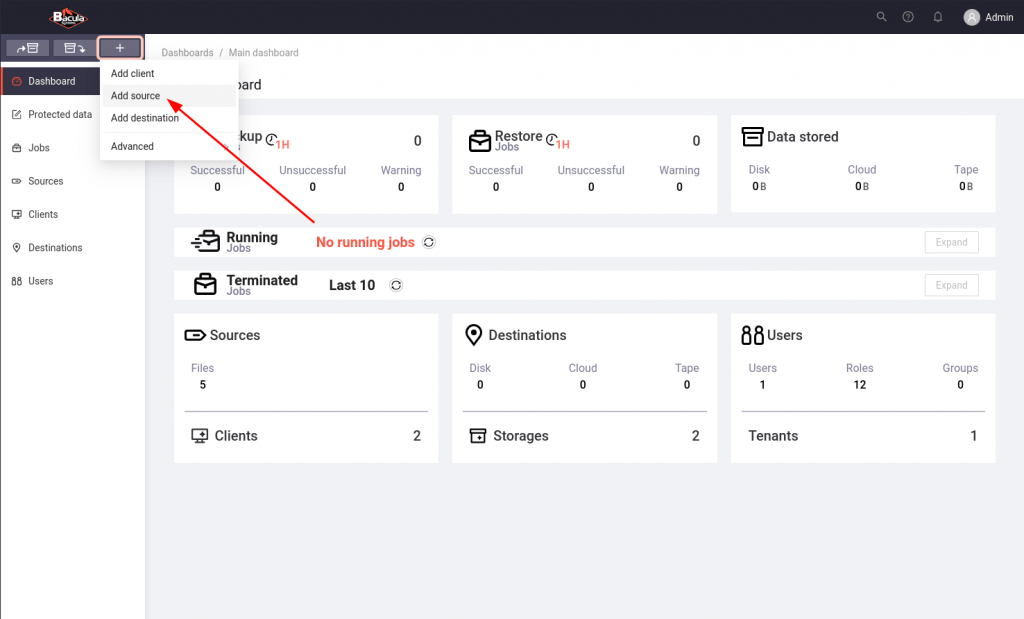
- On the left navigation panel, click the “+” icon, and choose “Add client”.

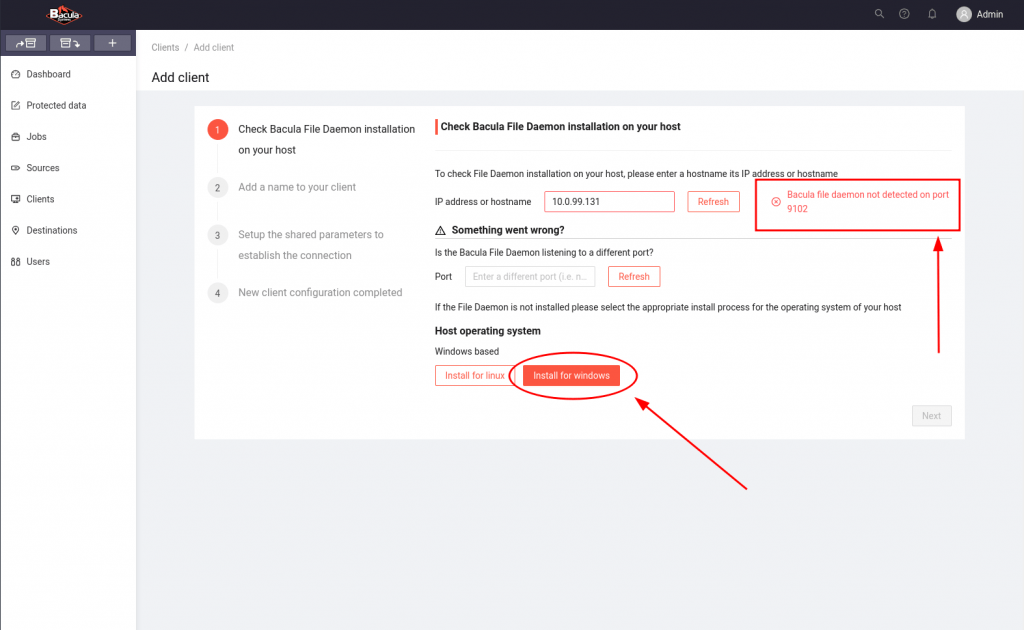
- This will open the Client configuration page. In Step 1, enter the IP address of the host you wish to configure and click “Check”.

- If no previous Bacula installation is detected, you will receive a message stating that BCenter is unable to detect the File Daemon, which is expected. In this case, click on “Install for Windows”.

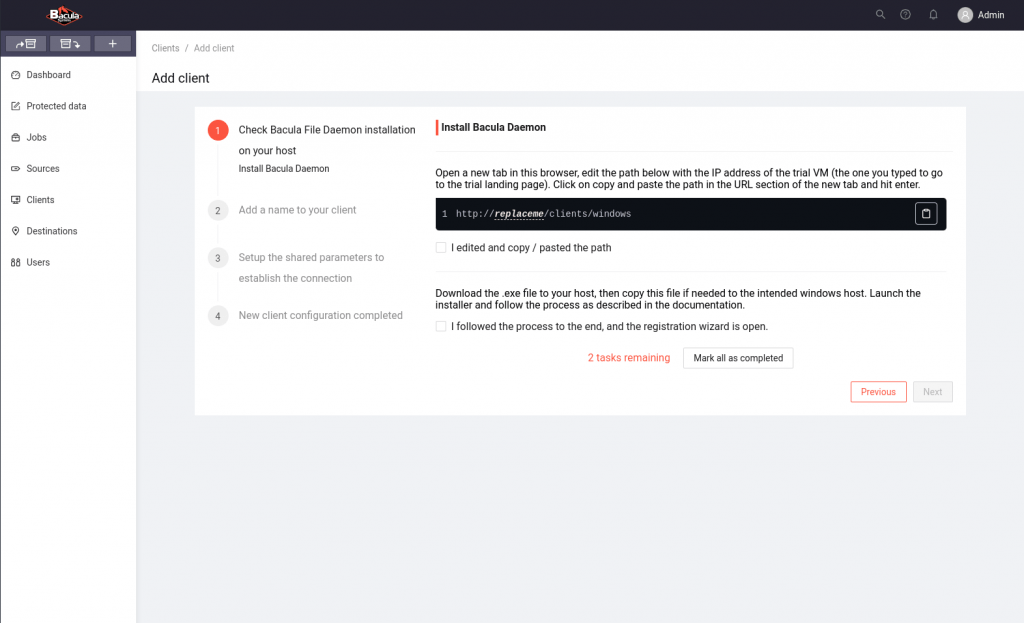
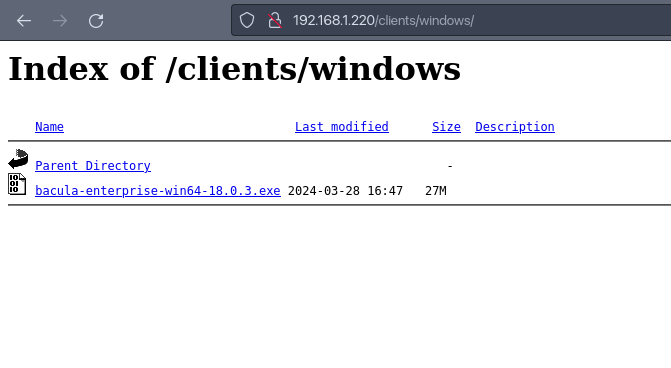
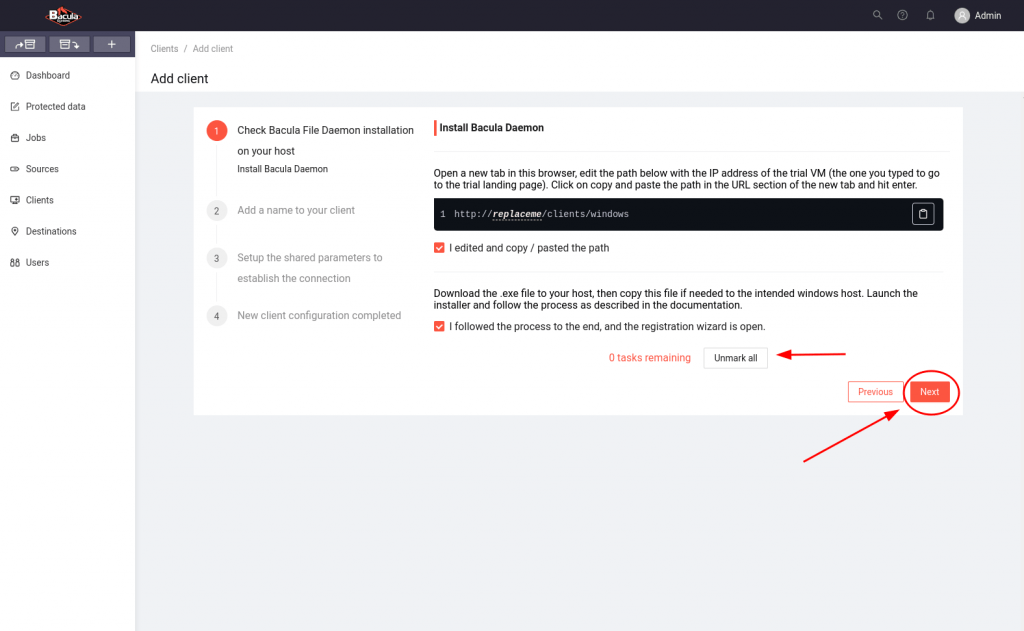
- At this point, you will need to open a new tab and follow the instructions provided in Step 1 – Install Bacula Daemon.

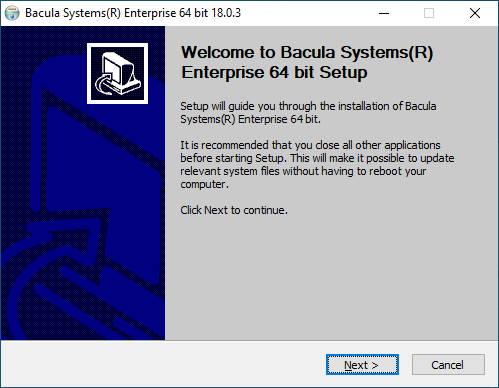
- Download Bacula Enterprise Windows installer and launch it.

- Click “Next” to start the installation.

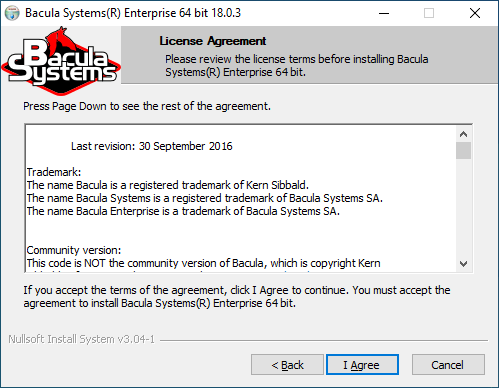
- On the License Agreement dialog, click the “I Agree” button.
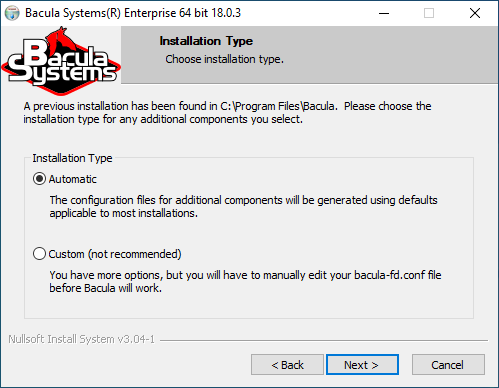
- Keep the “Installation Type” as the default option, which is “Automatic”.
- Expand the “Consoles” item on the “Choose Components” dialog and ensure that the “Registration Wizard” option is selected.
Then, click “Next”. - Leave the Director information fields empty, as the configuration will be handled by the “Registration Wizard”.
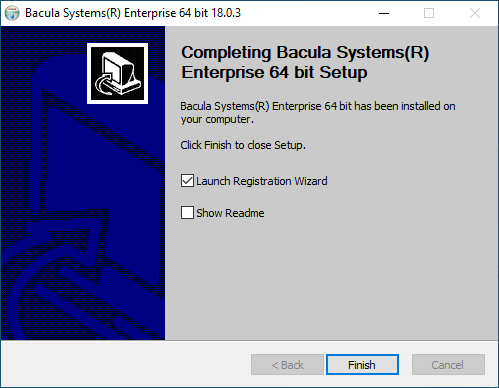
- On the “Completing Bacula Systems Enterprise 64 bit Setup” dialog, mark the checkbox for “Launch Registration Wizard” and click “Finish”.
- Return to the BCenter page and click “Mark all as completed”, then proceed to the next step.
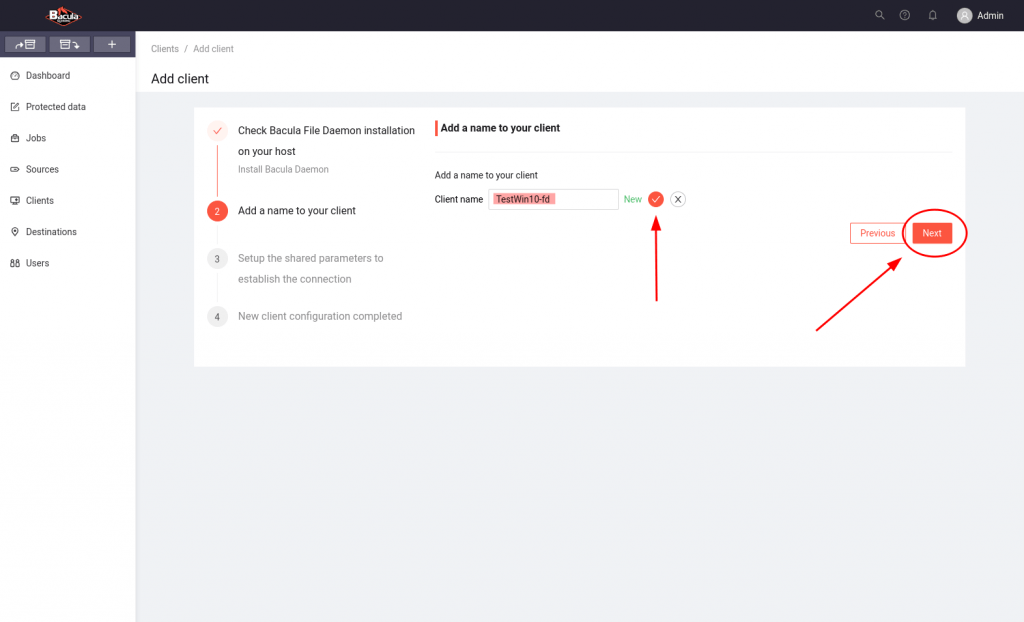
- Modify the Client name according to your preference in Step 2, save the modification, and proceed to the next step.

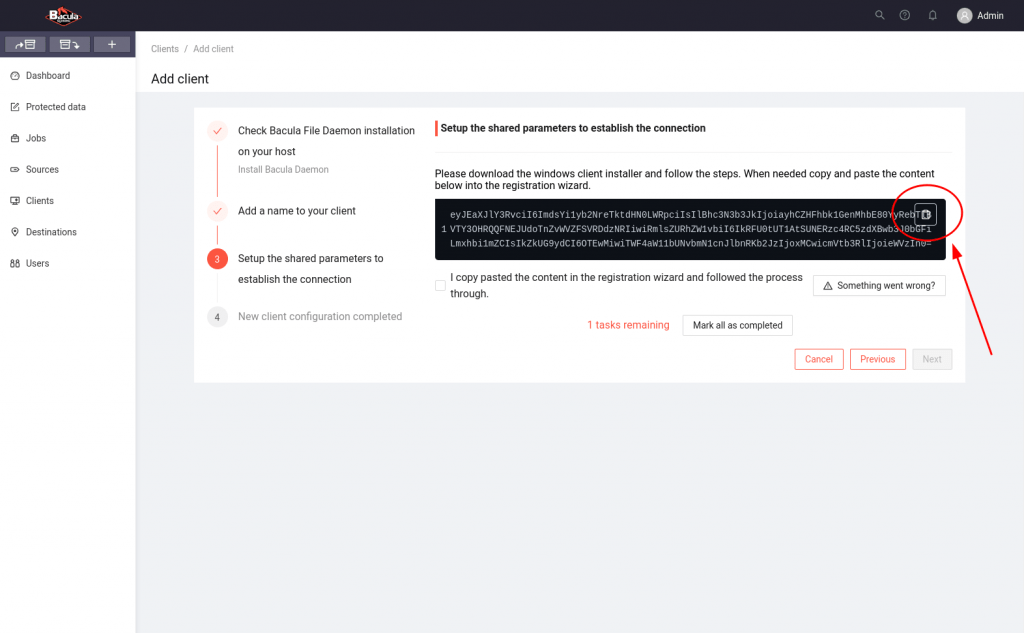
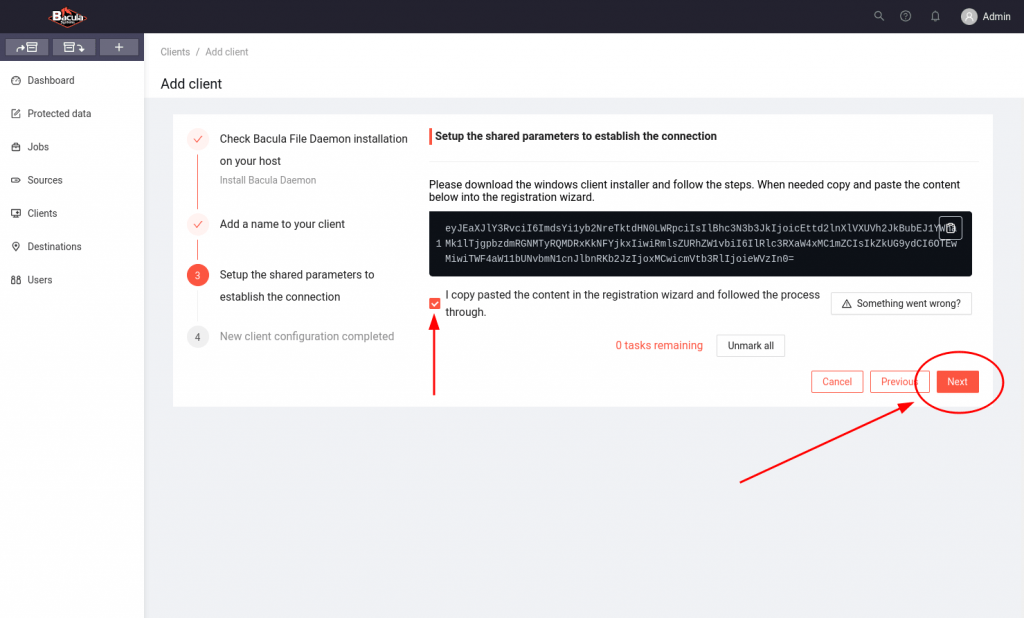
- Copy the content to the clipboard and navigate to the “Registration Wizard” tab on Windows.

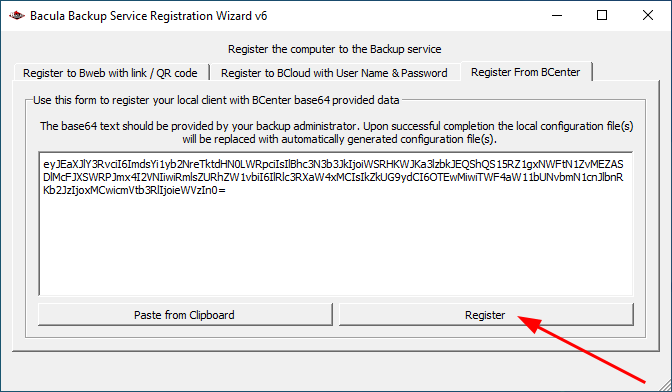
- Within the “Registration Wizard” tab, choose the “Register From BCenter” tab.

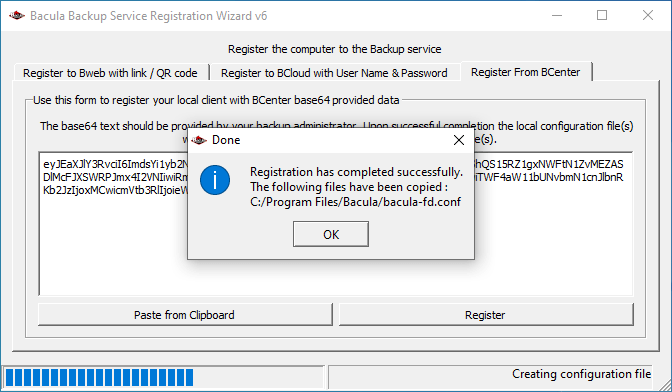
- Click the “Paste from Clipboard” button to paste the string obtained from BCenter in Step 3 of Client configuration, then click “Register”.

- The “Registration has completed successfully” dialog should appear. Click “OK” then click “Yes” to restart the bacula-fd client.
- Return to BCenter, mark the checkbox as done, and go “Next”.

- Once Step 4 is successfully finished, close the configuration and go to the Clients page. If the registration is successful, the newly registered client should be visible in the list.
 Note: If you do not see a similar page, see the “Testing Client Connectivity” section at the bottom of this document to find a solution. Typically, you will need to create a firewall rule to allow the Bacula Director on the Trial VM to contact the Bacula client service running on your Windows machine.

 Then, click “Next”.

 Note: If you do not see a similar page, see the “
Create Backup Job For New Windows Client
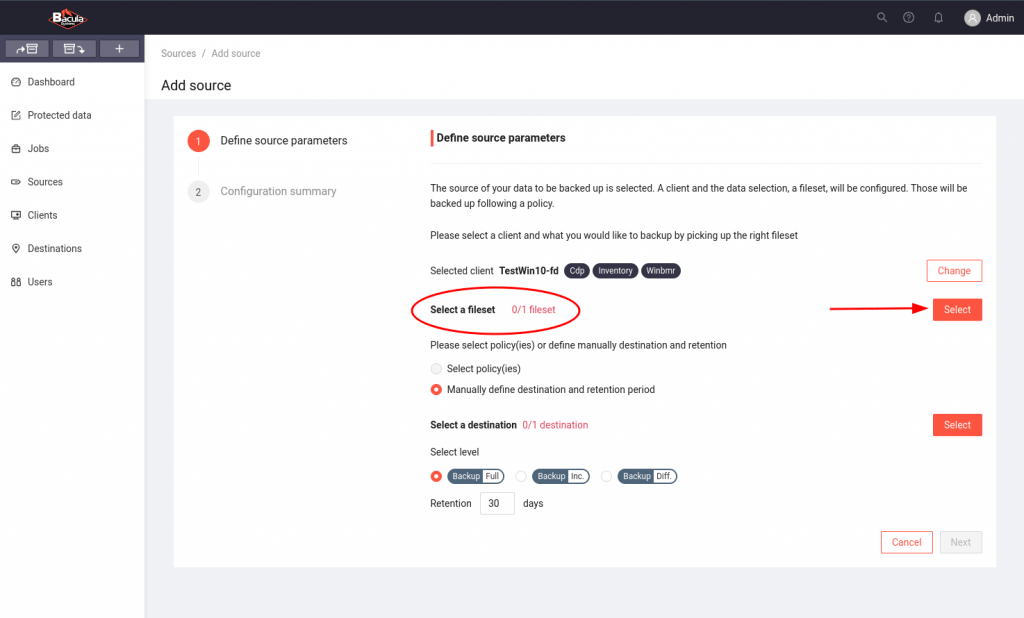
- Begin the backup process by selecting the “+” icon followed by clicking on “Add source”.
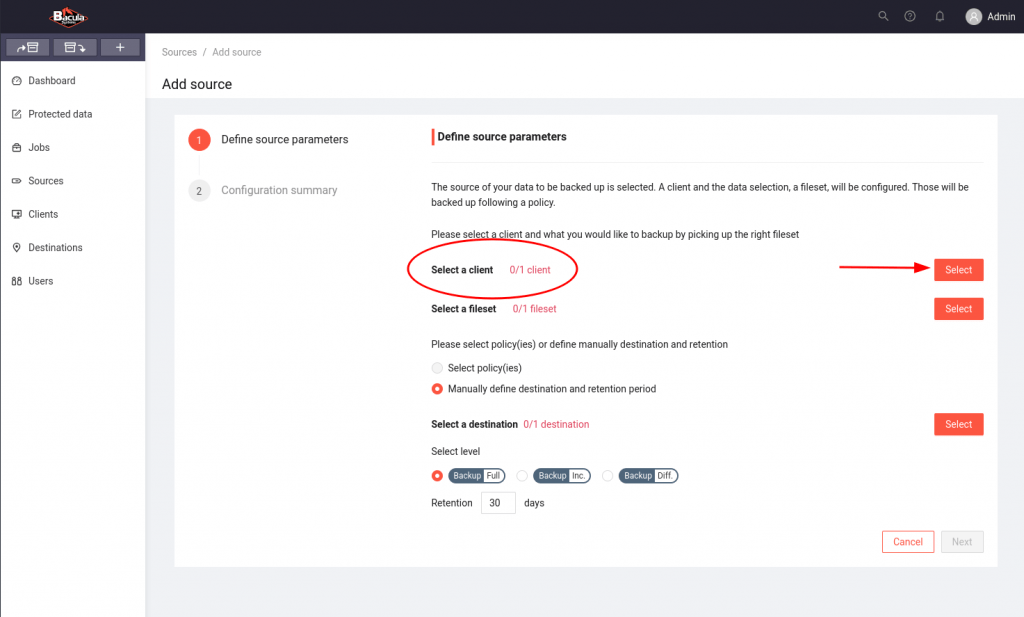
- Within the “Add source” page, the initial step is to choose the new client. Click “Select” on the right and add the client that was previously registered.


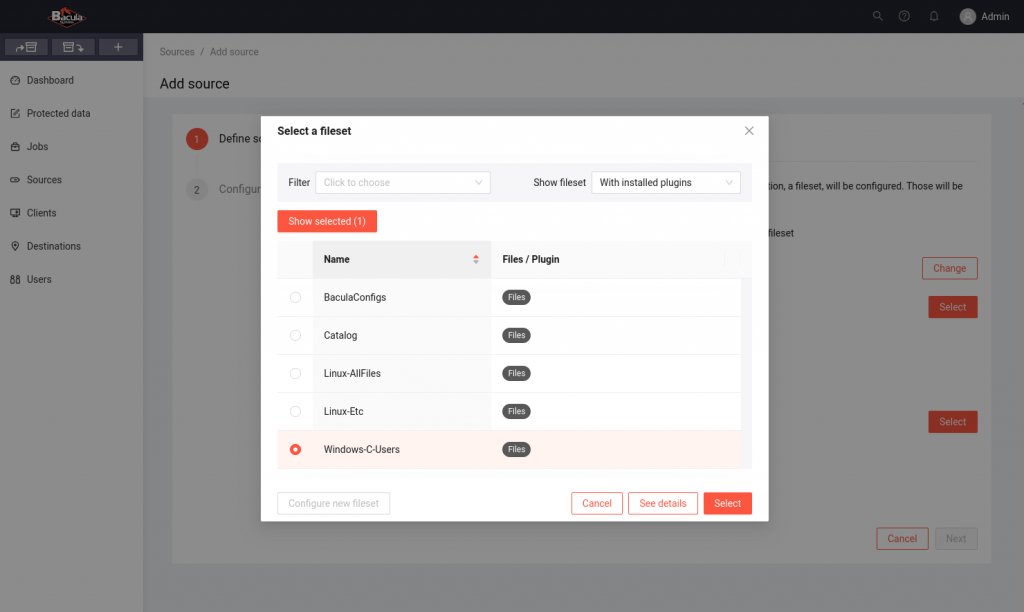
- Then, in the fileset section, choose “Windows-C-Users”, and click “Select”.

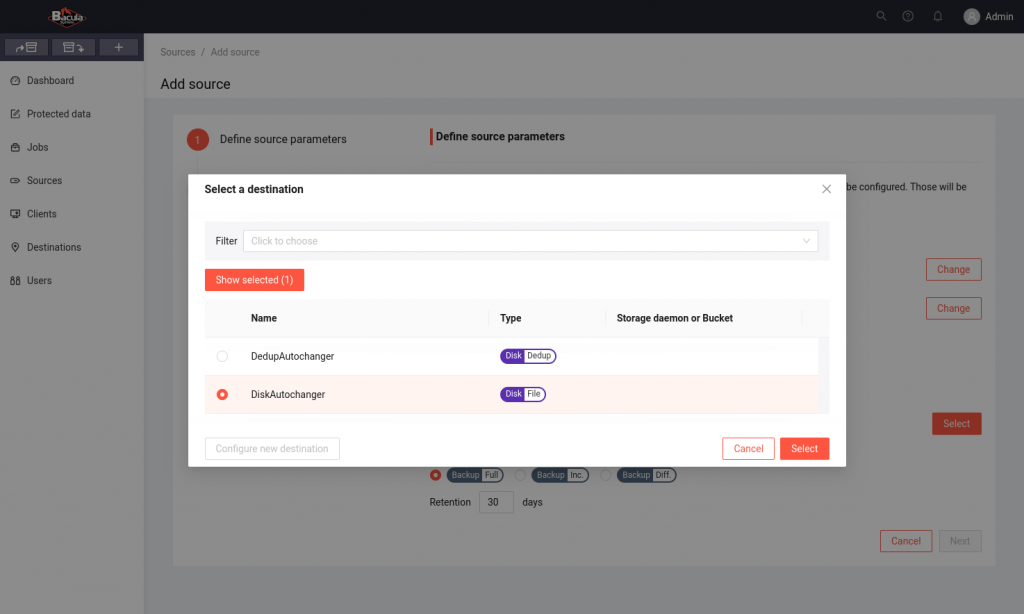
- For the destination, select “DiskAutochanger”, set the level of backup, and proceed by clicking on “Next”.


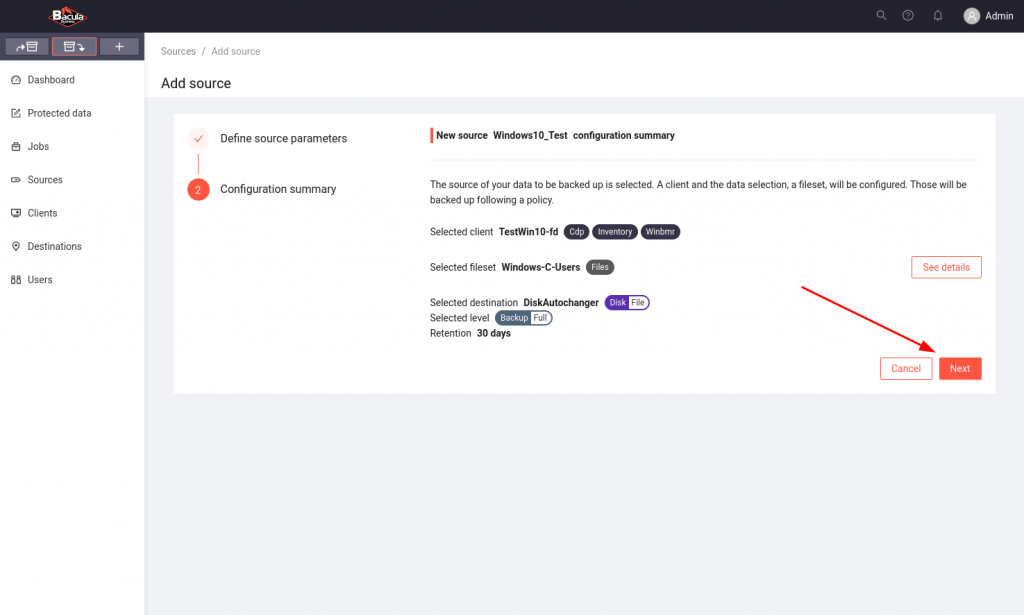
- Consider modifying the name of the source to something meaningful, such as “Windows10_Test” for example.
- Review the configuration summary, and check that everything is correct. Finally, click “Next”.

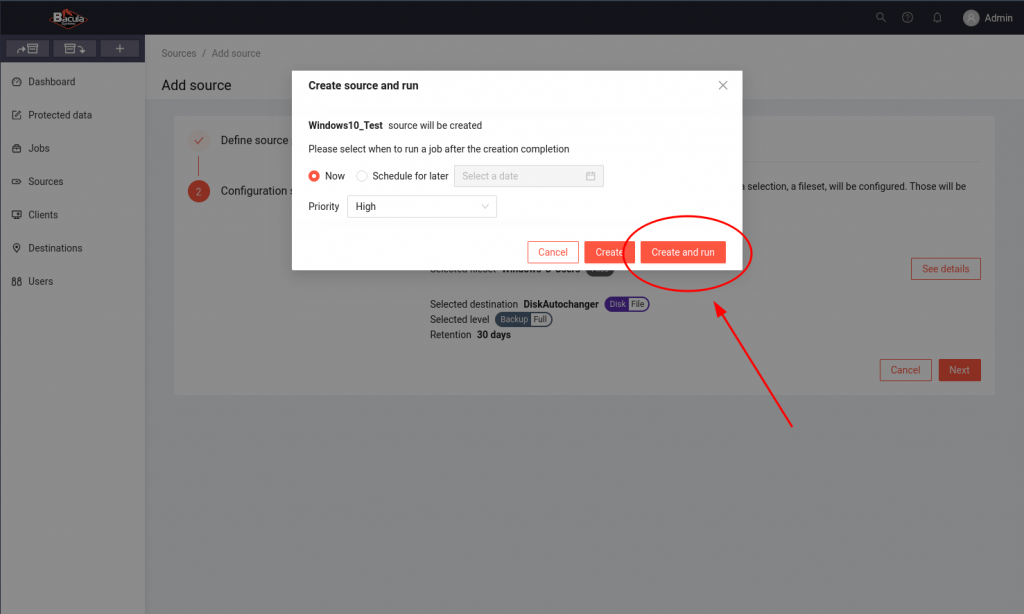
- Within the subsequent window, you have the option to schedule the job to run at a specific time. In this case, you can select “Now” and click “Create and run”.
- A pop-up window will inform you about the successful operation. You will then be redirected to the “Sources” page, where the newly created source should be listed.
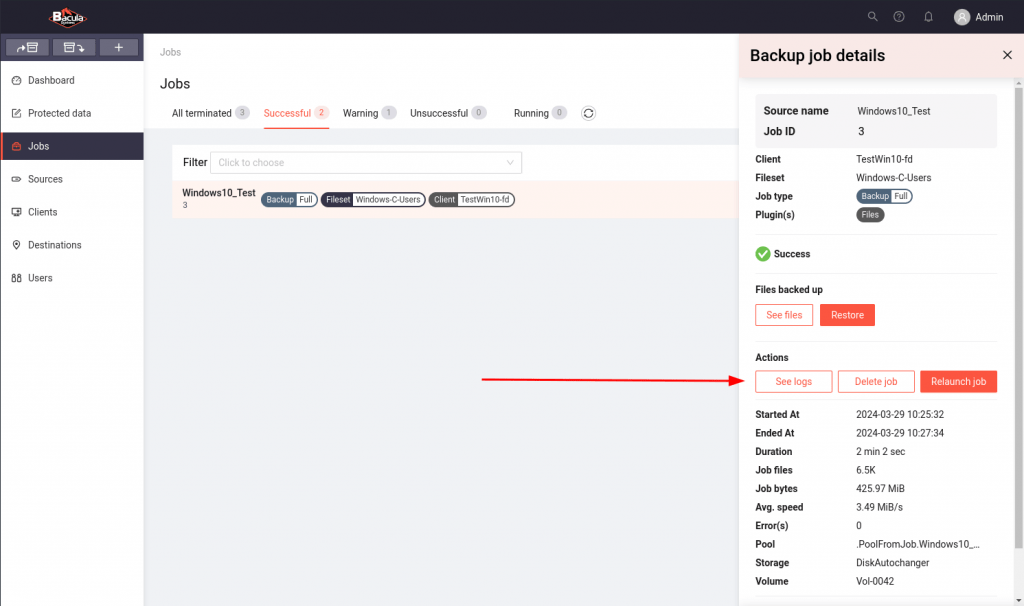
- Go now to the “Jobs” page, on the left, and select the “Running” tab. You should see the backup job running.

- When the job is completed, you can view the backup job details by hovering the cursor over the job and clicking “View details”. Click “See logs” to review all the steps of the backup.


Testing Client Connectivity:
- Check the IP addresses or fully qualified domain names in both the “Add client” configuration page in BCenter and on the Windows client in “C:\Program Files\Bacula\bacula-fd.conf”.
- On the new Windows Client, check that the firewall is disabled, or that inbound connections to port 9102/TCP are allowed from the Trial VM’s IP address. Microsoft provides a brief guide on creating such a rule here. You may also contact the Bacula Systems’ support team if you cannot determine the cause of the connectivity problem. To submit a helpdesk ticket, click the “Contact Support” icon on the Bacula Enterprise Trial’s Landing page in your browser.