Contents
- Built-in Azure Backup Solution
- Cloud backup – advantages and complications
- Microsoft Azure backup solutions for Azure instances
- Veeam Backup & Replication
- Veritas Backup Exec
- Vembu BDR Suite
- Cohesity DataProtect
- Druva inSync
- Acronis Cyber Protect
- NAKIVO Backup & Replication
- Dell PowerProtect Cyber Recovery
- Rubrik
- NetApp Cloud Volumes ONTAP
- Datto Continuity
- Bacula Enterprise
- Bacula Enterprise and Azure
- Azure portal configuration How-to (with screenshots)
- Configuration of Bacula Enterprise
- Final touches
- Conclusion
- Why you can trust us
Backup to the cloud is a nebulous topic. From public clouds hosted by a handful of major players, to private clouds creating clusters of highly available storage within a company’s own data centers, to hybrids of the two and everything in between, the explosive growth of cloud data storage options has naturally led companies to want to back up their data to these same locations.
Backup has its own requirements and considerations, some of which are complicated by cloud data storage principles, and in this article we will discuss how the leading Azure backup solutions and Bacula, address these to allow backup directly to Azure storage. We also explain the basic steps that you have to perform using the built-in backup tool – Azure Backup, which creates backups and uploads them to the cloud.
Built-in Azure Backup Solution
It should be mentioned that Microsoft Azure also offers its own backup-related service called Azure Backup. This service does exactly what it is named after – creates backups of data and transfers them to the Azure cloud. It can work both as an Azure VM backup system and as an Azure backup on-premise.
Azure Backup as a whole is not a particularly complicated system – it uses its own MARS (Microsoft Azure Recovery Services) agent to send data to an Azure Backup Service Vault. After that, this vault then connects to an actual Azure cloud storage account, ready to accept backups as soon as you’re done setting up a backup schedule.
Let us look at this process in a bit more detail. Here is the process of setting up an Azure storage backup, split into two parts – backup vault creation and backup scheduling.
- The first part of this process is all about creating a backup vault. To do that, we have to start with logging in to the Azure management portal.
- Right after that, you can find a “New” button at the bottom right part of the screen – here, you have to select these commands in the following order: “New – Data Services – Recovery Services – Backup Vault – Quick Create”
- The combination of menus above would allow you to input into two important fields: Vault name and Region.
- After the vault is created, you have to select it and choose “Download vault credentials” under the first bullet point of the “Protect On-premise workloads” list. This operation saves a credential file to your current system.
- Directly under the “Download vault credentials” option, you can see multiple variations of the “Download agent” operation, depending on your device type or backup purpose. Click the one that fits your use case and launch the install wizard.
- The installation process in all three cases is fairly straightforward – follow the install wizard’s recommendations to install everything with little to no effort. After the installation process is complete, you will be able to see a pop-up window with a phrase “Proceed to Registration” – clicking on it would continue the entire process.
- The first part of the registration process is vault credentials validation – this is where our previously saved vault credentials file comes in, you have to browse it within this same window.
- The following step consists of figuring out the encryption settings – you can generate a random passphrase, or input your own. This passphrase is essential for any restoration process of yours. You also have to pick the location that your passphrase would be saved at. Clicking “Next” one final time concludes this half of the process.
Backup scheduling is the second part of this entire Azure Backup setup process, and this one is significantly smaller, too:
- The first step here would be to launch the program we have previously installed (if it failed to launch automatically). In this program, you can see an entire panel of options on the right – pick “Schedule Backup” to begin.
- The “Schedule Backup Wizard” menu has multiple steps that help you with figuring out what you want to back up, how often to perform backups, and so on. The first step is to pick the backup target.
- The second step lets you figure out the frequency of a backup – up to 3 times per day or per week. There are also separate options for backup retention time, as well as many other features. When you’re done figuring out all of the settings for a backup and are out of the backup wizard, you can initiate the backup by clicking the “Back Up Now” button on the right part of the screen.
- The same could be done with the recovery process, with the “Recover Data” button being the correct prompt.
Despite its simplicity, Azure VM Backup is a backup solution that offers a rather impressive list of advantages, such as:
- Easy scalability;
- App-consistent backups;
- No data transfer limits;
- Multiple backup storage locations to choose from;
- Storage management automatization;
- Data retention (short-term and long-term) via Recovery Service vaults, and more.
However, Azure Backup is also not the perfect solution on the market, and far from being the only one that can backup data to Azure cloud storage. As such, we can present five best practices when it comes to picking a specific backup and recovery solution (Azure Backup is our current example):
- Backup target. The entire plan that describes your backup and recovery efforts – your backup strategy – changes a lot depending on the backup target that you have chosen. There is a massive difference between backing up regular files and folders, and creating app-aware backups of specific instances of VMs. Other variations of backup targets are databases (Azure SQL database backups are one such example), services, all kinds of VMs, and more – and you should figure out if a backup solution supports your backup target before getting it.
- Backup performance. Another significant part of any backup strategy is the recovery time – figuring out how much time you can spend on fixing a service or a server (RTO), or how much time you can work without a part of your data (RPO). Both of these depend on a massive number of factors, including backup time, data transfer time, highest possible bandwidth of your channel, and more.
- Company’s backup requirements. This is potentially a rather large topic, covering multiple different requirements for a company’s backup needs – and it is also used to figure out most of the other parts of this “best practices” list. It is highly recommended to figure out beforehand what specific features your company needs in terms of backup, including legal requirements, availability requirements, and many others.
- Backup price. Pricing is also important when it comes to picking a cloud backup and recovery solution, since it is not uncommon for different service providers to implement different models when it comes to cloud storage space. For example, Azure Backup offers a pricing system that consists of two main components: a variable charge depending on the amount of storage used by the backup, and a flat charge depending on an instance size. As such, it is important to find out what model your backup service is using beforehand.
- Recovery process. While backup as a process is important, it is extremely careless to forget about one more part of this – the recovery process. And this part of the service can also vary quite a lot depending on your cloud backup service of choice. For example, Azure backup and recovery system offers you the ability to recover VMs, workloads, system states and individual files, it can also be used to monitor backups, generate reports, run simple diagnostics, and more.
In this context, we should also mention another similar service – Azure Site Recovery. It is another highly specific service that provides a comprehensive Microsoft Azure disaster recovery feature set for your data, including copying VMs, enabling failover, and so on.
Cloud backup – advantages and complications
The advantages of cloud storage for backup are very clear. High availability, high reliability storage with low upfront cost, on-demand growth, and ease of moving data offsite, while increased upload bandwidth and cloud processing have given new avenues to take advantage of cloud storage. However, complications remain such as the amount of bandwidth required, increased complexity, management of stored data to keep costs inline, and potentially very long restore times should disaster strike your primary site.
Restore times are one of the many reasons why it is so important to have a functional backup system in the first place. Veeam’s Data Protection Report (2021) shows that the average downtime cost is approximately $1,410 for each and every single minute (adding up to a staggering $84,650 per hour). It would be fair to say that these results can be somewhat conflicting due to bigger organizations reporting far higher potential losses, but the message is still the same – downtime is a massive financial problem for any business.
Additionally, one of the biggest reasons for downtime in the modern world – ransomware – generates a massive downtime period of over 16 days on average, according to a Coveware study (2021). This kind of result, combined with the average downtime costs from the source above, is already a great reason for any company to invest into a comprehensive backup system.
Microsoft Azure backup solutions for Azure instances
As we have mentioned before, Azure Backup is not the only solution to offer backup services for multiple different data storage locations (including Azure cloud itself). As such, we have several more examples of different services with similar functionality:
Veeam Backup & Replication
As with most of the popular backup and recovery solutions, Veeam Backup is a popular backup system provider that supports a multitude of different backup locations and storage providers – this includes Azure data backup, as well. Veeam is capable of working in tandem with Azure Backup, taking a copy of the data directly from the Azure Backup Vault. As such, Veeam can monitor Azure Backup’s data copy as the primary one without recreating its own copy, offering better response times and better performance as a whole, combined with many useful features of Veeam.
Veeam tends to put a lot of emphasis on its VM backup and recovery capabilities, but that’s not to say that it cannot work with other storage types. In fact, it works with servers, cloud deployments, workstations, applications, and more. Veeam can provide data deduplication, impressive scalability, and instant granular data recovery, among other features.
Customer ratings:
- Capterra – 4.8/5 stars based on 69 customer reviews
- TrustRadius – 8.8/10 stars based on 1,237 customer reviews
- G2 – 4.6/5 stars based on 387 customer reviews
Advantages:
- Veeam’s basic backup and recovery task management capabilities are relatively simple and should not cause problems for customers, even the ones with little to no technical experience
- Both the customer support team and the Veeam community forums are extremely helpful when it comes to figuring out a solution for a specific issue
- Veeam’s first-time configuration is quick and painless, with very few elements that could be a potential issue for an uneducated customer
Shortcomings:
- As with plenty of other full-scale backup and recovery solutions, Veeam tends to generate personalized pricing for each client based on how many data sources the client has to cover (including different types of data storage) – however, Veeam’s general pricing approach can be somewhat confusing, and there are also specific elements or services that cost a lot more than the rest of the feature set
- Veeam may have plenty of features to choose from, but not all of its capabilities are at the same level of competence – for example,Veeam’s cyber security capabilities are relatively basic, and the same could be said for its data management features
- This particular solution has an interface that most people would consider outdated, especially when used alongside more modern software, such as Windows 11
Pricing:
- There’s little to no official information about Veeam’s pricing that is available on the official website. The only way to receive the exact price for everything that your specific company needs is to request a personalized quote.
- What Veeam does have is a pricing calculator page that lets users specify the number of different environments they want covered with Veeam’s solution, as well as the planned subscription period.
- This page can also be used to reveal basic information about Veeam’s pricing, such as:
- Veeam’s subscription can be purchased for at least one year in advance, and up to 5 years, with “multi-year contracts offering additional discounts”
- The workload selection screen offers one field for each of the following workload type: Virtual VM, Cloud VM, Servers, Workstations, M365 Users, NAS/File Shares (TB)
- The “Contact Us” button would not be available if only “NAS/File Shares” part is above zero
- Veeam sells licenses in increment of 5 at once, meaning that at least 5 licenses of one of the aforementioned categories have to be selected
- Protecting five workloads (either Virtual VM, Cloud VM, Server, or Workstation type) for a year costs $642
- “Microsoft 365” category is an exception, it requires at least 10 users to be selected at once, and the starting price for 10 users is $306
My personal opinion on Veeam:
Veeam is a comprehensive backup and recovery solution with a decent range of backup storage types it can work with (tapes are problematic) – and that includes Microsoft Azure. It can offer plenty of different features, but all of them are packed in a rather outdated-looking interface that is not exactly easy to manage. At the same time, Veeam’s features are not all developed to a specific level, with cybersecurity and data management being two good examples of what Veeam still has to work on.
Veritas Backup Exec
Expanding upon the topic of multifunctional backup solutions with Azure support, Veritas makes this list, offering an automated feature-rich resiliency platform with a multitude of data protection options. It supports a good number of different storage types and locations, can work with both regular data and virtual machines, offers workload migration capabilities to and from Azure, and has a centralized console for all of its operations. The large choice of capabilities that Veritas has well justifies its place on this list of Azure backup solutions.
Veritas managed to earn quite the portfolio over the years – since it is a relatively old company, even by this market’s standards. Several decades’ worth of positive reviews is what attracts more and more customers to Veritas Backup Exec (and other software offerings from the same company) – as well as its well developed feature list.
Customer ratings:
- Capterra – 4.0/5 stars based on 7 customer reviews
- TrustRadius – 6.8/10 stars based on 150 customer reviews
- G2 – 4.1/5 stars based on 230 customer reviews
Advantages:
- An outstanding feature range plays a significant part in how Veritas attracts new customers and retains existing ones
- The interface of Veritas is relatively simple and mostly user-friendly, which may come as a surprise for a solution that is this old
- The solution’s customer support is also a highlight of Veritas, with an overwhelmingly positive customer reviews gathering for many years
Shortcomings:
- Veritas does support automatic report creation, but there are little to no customization for them, even the default report saving location cannot be modified
- Some of the features that Veritas has are not particularly customizable, either, such as the tape library integration – it works in its base form, but there are plenty of issues that are yet to be ironed out
- Getting back to reporting as a feature, the process itself is not exactly difficult, but exporting a report in a specific file format can be inconvenient at best, and extremely difficult
Pricing:
- Veritas’s pricing information is not publicly available on their official website and the only way to obtain such information is by contacting the company directly.
My personal opinion on Veritas:
Veritas is one of the more mature solutions on this list, and this particular factor plays a hand in how people perceive this software. Veritas managed to collect a good portfolio of positive reviews over the years, and both its age and the number of past projects is what bigger enterprises usually look for in companies they want to work with on a regular basis. Veritas is packed full of different features, it supports both physical and virtual deployment types, but a few specific features of the software are very basic and non-customizable, especially when it comes to reporting as a whole.
Vembu BDR Suite
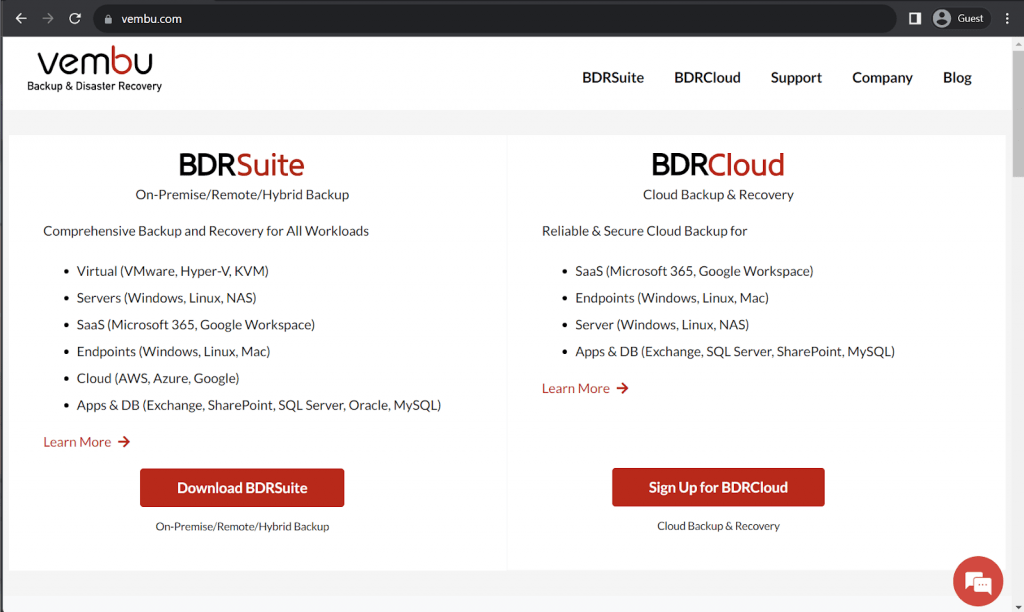
Available as both Azure backup on-premise and cloud service, Vembu BDR is another example of a popular multifunctional backup solution that can also work with Azure data. Vembu offers multiple different options when it comes to Azure, be it a backup to another account, a backup to a different location, and many others – combined with a user-friendly interface and responsive customer support.
Vembu BDR Suite is a comprehensive backup and recovery platform with a variety of supported storage types – databases, cloud storage, endpoints, applications, and VMs. It can be deployed in both physical and hybrid infrastructures, and its SaaS counterpart in the form of a Vembu BDR Cloud covers the “virtual” infrastructure type (since it does not need to be deployed in order to start working).
Customer ratings:
- Capterra – 4.5/5 stars based on 17 customer reviews
- TrustRadius – 8.4/10 stars based on 88 customer reviews
- G2 – 4.2/5 stars based on 130 customer reviews
Advantages:
- Vembu is one of the few backup and recovery software development companies that offers a good number of different features while also having a relatively simple and easy-to-use interface
- One of the least common features that Vembu can offer is a fully functional Linux version of the software, even if it does not have feature parity with the Windows version
- As for relatively common advantages, Vembu’s customer support is quick and helpful, gathering plenty of positive reviews over the years
Shortcomings:
- A part of Vembu’s appeal is in its scalability that works both ways, but the reality is that the pricing of this solution would prevent most SMBs from adopting it purely because of cost reasons
- While it is true that the majority of Vembu’s interface is user-friendly, there are still some features or design choices that stand out from the rest by being a lot more sophisticated than the rest
- Most of the logic behind the customer support’s advice is taken directly from the Windows version of the software, which is not identical to the Linux version, creating some unnecessary confusion from time to time
Pricing:
- Vembu BDR Suite’s pricing varies quite a lot depending on the target data source, and can be purchased using either a subscription-based model or a perpetual license.
- Subscription-based pricing model includes:
- VM backup – from $18 per year per VM, with support for both Hyper-V and VMware deployments
- Server backup – from $60 per year per server, both Linux and Windows servers are supported
- Application/DB backup – from $60 per year per application/database, can work with SQL, MySQL, and Exchange
- SaaS backup – $12 per year per user, works for Google Workspace and Microsoft 365
- Cloud VM backup – $30 per year per AWS instance
- Endpoint backup – from $15 per year per endpoint, supports Windows and Mac devices
- Alternatively, pricing model based on perpetual licensing includes:
- VMware or Hyper-V backup – from $90 per VM or $432 per CPU socket
- Server backup – from $150 per server, Windows Server version supports file, folder, and image-level backups, while Linux Server version only supports file and folder backups
- Cloud VM backup – $75 per single AWS EC2 instance
- SaaS backup – $30 per user, applies to Google Workspace and Microsoft 365
- Endpoint backup – from $37.5 per endpoint, both Windows and Mac devices can backup files and folders, but only Windows version also supports the image version
- Application/DB backup – $150 per application/database, can work with SQL, MySQL, and MS Exchange
- Vembu’s pricing model can be rather confusing, offering both perpetual licenses and subscriptions, as well as several different subscription “levels” to choose from. A lot more details about Vembu BDR Suite’s pricing can be obtained at the official pricing page.
My personal opinion on Vembu:
Vembu is another well-known powerhouse of backup software, but this one puts quality above quantity. There are only two solutions that Vembu offers to its customers – BDR Suite, a comprehensive deployable software with a long list of features. This does have some platform compatibility issues, though, and BDR Cloud, which is a portable version of the BDR Suite that lacks some features but can also be used without physically deploying it to each server.
Cohesity DataProtect
Simple yet effective data protection options is what Cohesity DataProtect is known for, offering good and different features for the best user experience possible. It is a comprehensive data platform designed to defend its users against ransomware attacks. It helps with mitigating legacy infrastructure issues and has comprehensive policy-based protection for your servers. As for the Azure-specific features, there are cloud-native backups, direct backups, dev/test capabilities, and many other options that make Cohesity a strong contender among other Azure backup solutions.
Cohesity DataProtect is capable of covering information that is in the cloud, on-premise, or even in a SaaS form. It is fast, secure, and uses its own node-like structure to offer unprecedented levels of scaling without any performance loss – a feat most competitors would struggle to achieve.
Customer ratings:
- Capterra – 4.6/5 stars based on 48 customer reviews
- TrustRadius – 8.9/10 stars based on 59 customer reviews
- G2 – 4.4/5 stars based on 45 customer reviews
Advantages:
- Cohesity offers a great level of versatility and customization to its users, including online profiles and vast scheduling capabilities
- A centralized management console like the one Cohesity provides is a great way to control and manage all kinds of processes and operations related to data security within the organization
- Another part of Cohesity that is easy to work with is its first-time setup process, which customers described as simple and accessible
Shortcomings:
- Cohesity’s approach to updates as a whole is confusing to a certain degree – some of the updates can only be applied via a command line, which is both challenging and time-consuming for the majority of customers
- Customer support is a surprising weak spot of Cohesity’s solution, with most replies being standardized and rarely helpful to the customers
- Cohesity’s immutable backup feature is not, in fact, immutable – this information can still be accessed by a person with administrative permissions, which is a massive security risk
Pricing:
- Cohesity’s pricing information is not publicly available on their official website and the only way to obtain such information is by contacting the company directly for a free trial or a guided demo.
- The unofficial information about Cohesity’s pricing states that its hardware appliances alone have a starting price of $110,000 USD
My personal opinion on Cohesity:
Cohesity’s biggest selling point is its own unusual structure based on nodes and clusters – it allows the solution to be scalable with minimal performance losses whatsoever. Aside from that, Cohesity does not have that many unique features that would make it stand out among its competitors – but that’s not to say that it is a useless solution. Cohesity supports a number of storage types, has plenty of customization options, and is relatively easy to set up initially – but there are some reports of a relatively weak customer support and the unconventional approach to the update process (forcing some updates to be installed using specifically the command line and nothing else). Kubernetes support is currently missing.
Druva inSync
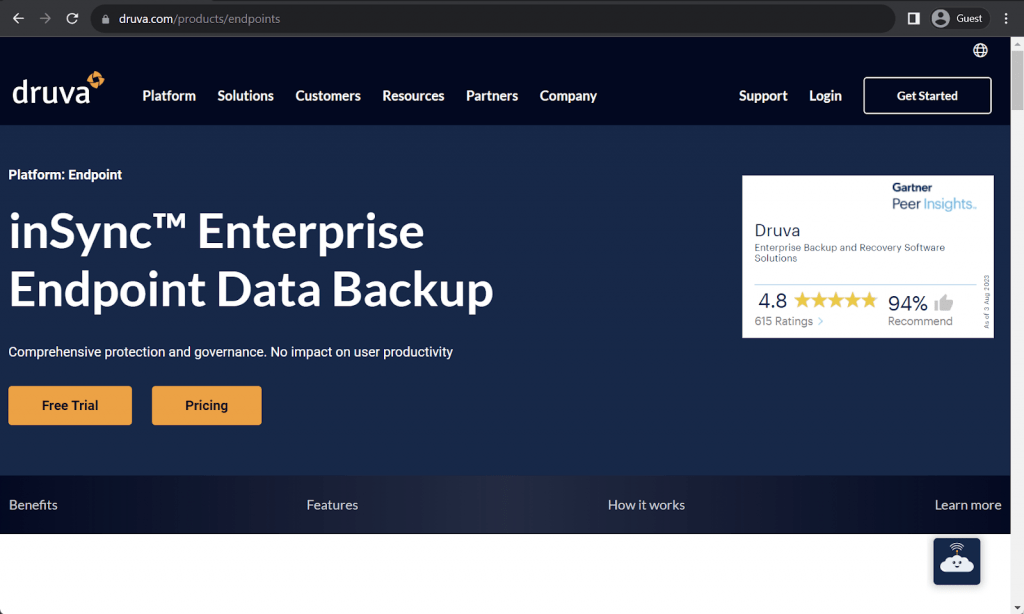
User data tracking and monitoring is one of many things that Druva inSync excels at, offering multiple workloads with unified data protection. It can perform backups, monitor data for compliance purposes, enhance overall data visibility, and so on. Other features include automatic user provisioning for Azure, cross-platform capabilities, AD integration and capabilities to address different backup types. The ability to centralize your backup and restore operations for the entire company is also extremely useful.
Druva inSync is the company’s solution to the ever-rising problem of data security in the context of workforce mobility. Since so many employees are using different kinds of devices on the go to access work-related data, it becomes increasingly difficult to keep track of it all and protect it accordingly. Luckily, Druva inSync can solve that issue, providing companies with the ability to secure data stored on mobile devices or in-cloud without compromising the company’s compliance and/or legal status.
Key features
- Data Loss Prevention capabilities with the ability to wipe devices remotely
- Federated search across all existing backups with impressive performance
- Ransomware recovery and data protection
- AES-256 encryption for data at rest, TLS 1.2 encryption for information mid-transit
Pricing
- Druva offers its own separate pricing models for each of their products – and inSync is no exception.
- There are two main pricing tiers in Druva inSync:
- “Enterprise” – $8 per month per user, a standard feature set of inSync with SSO support, Data Loss Prevention features, MDM integrations, and all of the basic data protection features
- “Elite” – $10 per month per user, adds to the “Enterprise” features with eDiscovery, defensible deletion, federated search, and more
- Additionally, each user can purchase add-ns such as sensitie data governance, ransomware recovery, or endpoint backup for government – for an additional cost
My personal opinion on Druva inSync
Druva inSync is the first “unconventional” solution on this list – it is not a full-scale backup solution, nor even a backup solution in the traditional sense. It is a software offering that aims to solve the issue of protecting sensitive data in the context of the ever-rising data mobility in recent years, covering mobile devices such as smartphones and laptops with various security measures. It can offer data encryption, DLP, remote wipe, federated search, ransomware protection, and plenty of other features. Hower, it does not have native VM support for Microsoft Azure, and may not work well for organizations with medium and large on-site data volume.
Acronis Cyber Protect
Acronis is a well-known name in backup, so it is no surprise that Acronis Cyber Protect also supports Azure VMs. It can perform app-aware backups, can work in tandem with Azure Backup, can create its own copy alongside Azure Backup one, and more. Acronis Cyber Protect can get a bit overwhelming at times, but it definitely is not lacking in features.
Acronis Cyber Protect is, in many ways, a natural continuation of the Acronis Cyber Backup – a deprecated backup and recovery software from Acronis that is now included in the Cyber Protect solution in its entirety. Acronis Cyber Protect was built upon this feature set and extended it even more, adding even more features and a bigger emphasis on data security – which is why now Acronis has the reputation of one of the most secure enterprise-level backup solutions on the market.
Customer ratings:
- Capterra – 4.5/5 stars based on 204 customer reviews
- TrustRadius – 7.8/10 stars based on 133 customer reviews
- G2 – 4.3/5 stars based on 668 customer reviews
Advantages:
- An extensive feature set is one of the bigger advantages of Acronis Cyber Protect, offering the coverage of VMs, workstations, applications, servers, and other deployment types
- Acronis has some security qualities, with comprehensive backup monitoring, high-class encryption, AI-based malware detection, and many others
- Unlike some of its competitors, Acronis Cyber Protect is able to readily provide well-detailed reports on any part of the infrastructure
Shortcomings:
- While the feature range of Acronis Cyber Protect is impressive on its own, there is a significant learning curve that every new Acronis user has to go through
- There are some VM types that Acronis cannot protest natively
- A rather surprising disadvantage of Acronis Cyber Protect is the fact that it has very limited scalability as a whole – it is far less flexible than a lot of other enterprise-level backup software
- The pricing of this solution is well above the market average, and it is fair to say that only some businesses would be able to afford Acronis as their full-time data security solution
- No Kubernetes support
Pricing:
- There are three versions of Acronis Cyber Protect that differ quite a lot in their approach to pricing – Standard, Advanced, and Backup Advanced (Acronis Cyber Protect – Backup Advanced is an extension of a legacy software called Acronis Cyber Backup, the standard package of this software’s capabilities is now included in Acronis Cyber Protect Standard by default)
- Acronis Cyber Protect Standard and Advanced have their own share of differences, with the Advanced version building upon the Standard version by adding SAN storage snapshots, Acronis ASign, Acronis Notary, tape backup support, Xenserver support, Oracle VM Server support, and more.
- As such, it is fairly normal for the Advanced version to cost more than the Standard one, including:
- From $85/$129 (Standard/Advanced respectively) per one workstation, be it physical or virtual, macOS or Windows
- From $595/$925 (Standard/Advanced respectively) for one server, be it physical or virtual, Linux or Windows
- From $705/$1,175 (Standard/Advanced respectively) per one virtual host, be it Hyper-V or VMware (no limitations on the number of virtual machines per host)
- From $285 for one instance of Microsoft Windows Server Essentials (physical/virtual), includes application backup, only available in Acronis Cyber Protect Standard
- The capabilities of Acronis Cyber Protect – Backup Advanced have a completely different approach to pricing depending on the nature of the backup target:
- From $109 per one workstation, be it physical or virtual, macOS or Windows
- From $779 for one server, be it physical or virtual, Linux or Windows
- From $1,019 per one virtual host, be it Hyper-V or VMware (no limitations on the number of virtual machines per host)
- From $139 for either Microsoft 365 data (across SharePoint Online, Teams, OneDrive for Business or Exchange Online) or Google Workspace data (across Contacts, Calendar, Drive, or Gmail)
- Acronis Cyber Protect – Backup Advanced can offer file-level backups, image-based backups, incremental/differential backups, ransomware protection, vulnerability assessment, group management, AD integration, reports, and more.
My personal opinion on Acronis Cyber Protect:
Acronis has a reputation of putting a lot of emphasis on data security – be it high-class encryption, backup status monitoring, and even a few of the unconventional features in this department (such as AI-based malware scanning). Unfortunately, Acronis also has plenty of issues of varying scale, from its high price to limited scalability, lack of technology compatibility, or the overall complexity of the software.
NAKIVO Backup & Replication
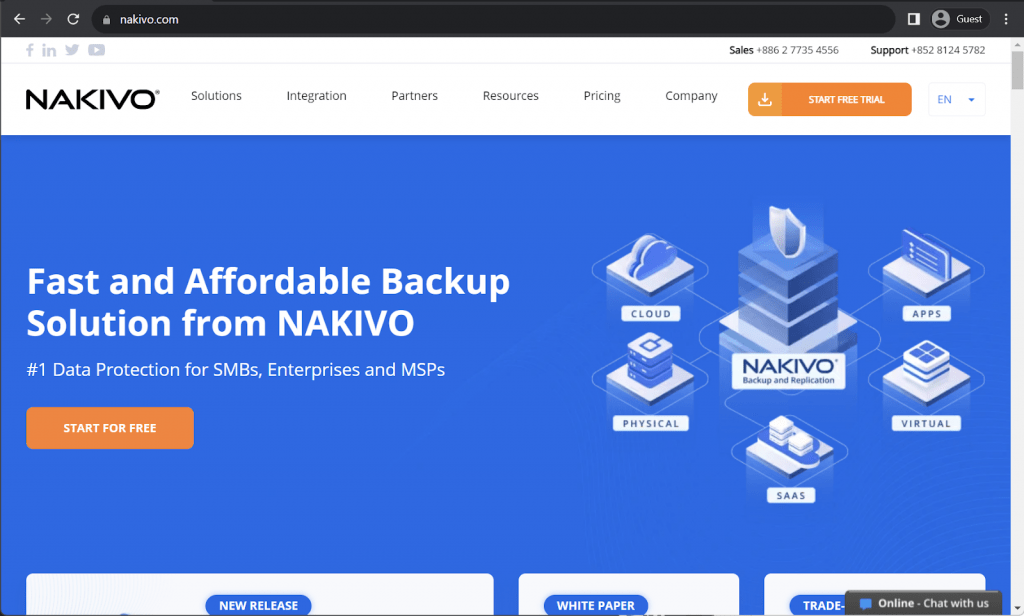
NAKIVO puts quite a lot of emphasis on being user-friendly and easy to deploy. When combined with a wealth of different features and use cases, this kind of approach to data protection makes it a well known solution on the market. NAKIVO can perform backup and recovery operations, provide ransomware protection, easy workload scheduling, granular instant recovery and helpful technical support. A feature of NAKIVO that makes it a great addition to this list of Azure backup solutions is its capability to use Azure as a storage location, among many other sources (cloud or otherwise).
NAKIVO is not a particularly old company by this market’s standards – it has only been available for a little more than a decade. However, it was enough for NAKIVO’s solution to gather a lot of popularity and recognition as one of the best enterprise-grade backup solutions this market has.
Customer ratings:
- Capterra – 4.8/5 stars based on 305 customer reviews
- TrustRadius – 9.2/10 stars based on 142 customer reviews
- G2 – 4.7/5 stars based on 203 customer reviews
Advantages:
- A significant advantage of NAKIVO as a comprehensive backup and recovery solution is the fact that its first-time configuration process is designed to be as simple as possible in order for customers of any skill level to be able to deploy it properly
- Another impressive advantage of the solution is in its user-friendly interface, it can provide an easy access to a variety of features while also offering an informative centralized overview panel with all of the necessary backup-related information in one place
- NAKIVO’s customer support is praised, with customers noting quick response times and accurate information
Shortcomings:
- Unfortunately, NAKIVO’s customer support team cannot do much when there is very little information that could be gathered about a specific error or issue within the system
- While NAKIVO does have a separate Linux version of its software, the number of features it can offer is not even close to the capabilities of the Windows version, making it a tad difficult to work with Linux servers in the first place
- NAKIVO can technically work with businesses of practically any size, from small to large – but NAKIVO’s pricing approach makes it extremely difficult for most SMBs to afford the software in question in the first place
- Support for Proxmox is missing
- In-cloud capabilities are limited
- Physical restore has been reported to be slow
Pricing:
- NAKIVO’s pricing can be split into two main groups:
- Subscription-based licenses:
- “Pro Essentials” – from $1.95 per month per workload, covers most common backup types such as physical, virtual, cloud and NAS, while also offering instant granular recovery, virtual and cloud replication, storage immutability, and more
- “Enterprise Essentials” – from $2.60 per month per workload, adds native backup to tape, deduplication appliance integration, backup to cloud, as well as 2FA, AD integration, calendar, data protection based on policies, etc.
- “Enterprise Plus” does not have public pricing available, it adds HTTP API integration, RBAC, Oracle backup, backup from snapshots, and other features
- There is also a subscription available for Microsoft 365 coverage that costs $0.80 per month per user with an annual billing and can create backups of MS Teams, SharePoint Online, Exchange Online, OneDrive for Business, and more
- Another subscription from NAKIVO is its VMware monitoring capability that comes in three different forms:
- “Pro Essentials” for $0.90 per month per workload with CPU, RAM, disk usage monitoring and a built-in live chat
- “Enterprise Essentials” for $1.15 per month per workload that adds AD integration, 2FA capability, multi-tenant deployment, and more
- “Enterprise Plus” with no public pricing that adds RBAC and HTTP API integrations
- Perpetual licenses:
- Virtual environments:
- “Pro Essentials” for $229 per socket, covers Hyper-V, VMware, Nutanix AHV, and features such as instant granular recovery, immutable storage, cross-platform recovery, etc.
- “Enterprise Essentials” for $329 per socket, adds native backup to tape, backup to cloud, deduplication, 2FA, AD integration, and more
- “Enterprise Plus” with no public pricing that adds RBAC and HTTP API integrations, as well as backup from storage snapshots
- Servers:
- “Pro Essentials” for $58 per server, covers Windows and Linux, and features such as immutable storage, instant P2V, instant granular recovery, etc.
- “Enterprise Essentials” for $329 per server, adds native backup to tape, backup to cloud, deduplication, 2FA, AD integration, and more
- “Enterprise Plus” with no public pricing that adds RBAC and HTTP API integrations
- Workstations:
- “Pro Essentials” for $19 per workstation, covers Windows and Linux, and features such as immutable storage, instant P2V, instant granular recovery, etc.
- “Enterprise Essentials” for $25 per workstation, adds native backup to tape, backup to cloud, deduplication, 2FA, AD integration, and more
- “Enterprise Plus” with no public pricing that adds RBAC and HTTP API integrations
- NAS:
- “Pro Essentials” for $149 per one Terabyte of data, can backup NFS shares, SMB shares, folders on shares, and offer file level recovery
- “Enterprise Essentials” for $199 per one Terabyte of data, adds AD integration, 2FA support, calendar, multi-tenant deployment, etc.
- “Enterprise Plus” with no public pricing that adds RBAC and HTTP API integrations
- Oracle DB:
- “Enterprise Plus” is the only option available for Oracle database backups via RMAN, it can offer advanced scheduling, centralized management, and more
- VMware monitoring:
- “Pro Essentials” for $100 per socket with CPU, RAM, disk usage monitoring and a built-in live chat
- “Enterprise Essentials” for $150 per socket that adds AD integration, 2FA capability, multi-tenant deployment, and more
- “Enterprise Plus” with no public pricing that adds RBAC and HTTP API integrations
- Virtual environments:
My personal opinion on NAKIVO:
NAKIVO Backup & Replication attempts to solve one of the biggest and the longest-running issues in the enterprise-level backup software market – the issue of software complexity for less experienced users. NAKIVO’s software attempts to be as user-friendly as it can, offering a simple yet effective user interface, a centralized data control panel, and so on. It can be quite expensive, on the other hand, and the lack of detailed reporting makes most issues a lot more complex than they should be. However, the solution as a whole is very competent and effective in what it does. cFor some, its lack of flexibility and compatibility may put some off.
Dell PowerProtect Cyber Recovery
As a long-standing partner of Microsoft in multiple fields, Dell also has a number of solutions dedicated to Microsoft Azure backup on premise and remotely. One such solution is Dell PowerProtect Cyber Recovery – a combination of a backup solution and a data security system that offers a plethora of different features to its users. It can be deployed extremely fast, is capable of automatically creating copies of existing data to isolate it in a secure digital vault of sorts, and there are also features such as data governance support, dynamic restore capabilities, expert guidance from Dell Technologies’ own specialists, and more.
Key features
- Capability to separate sensitive data physically and/or logically within Dell’s data vault
- A variety of analytical features powered by machine learning to ensure proper data recoverability
- Multiple layers of controls and security to provide true data immutability
- Support for on-premise deployments, public cloud data and private cloud infrastructures
Pricing
- There is no official pricing data available on Dell’s product web page, the only way to gain this kind of data is to request a personalized quote from the company itself.
My personal opinion on Dell PowerProtect Cyber Recovery
Dell PowerProtect Cyber Recovery is a rather unusual software offering from the well-known technological company. PowerProtect Cyber Recovery can offer support for data governance, extensive customer support, dynamic restore, and a fast deployment time. Limited data management is also an issue. It also works with both on-premise and cloud deployments (both private and public), and uses different security controls in order to deliver data immutability. Overall though, the offering has a complicated and confusing set of data protection products that will be problematic for some.
Rubrik
A unified software solution that promotes ease of use in many different cases is what Rubrik is known for, providing an API-first architecture with support for many types of storage, operating systems, cloud storage providers and applications. It is a strong Azure backup solution for protecting data from ransomware, making it easy to transfer workloads, accelerates cloud adoption and enables advanced data protection across many different applications and storage locations – which is why Rubrik belongs to the Azure backup solutions list.
Rubrik is another good example of a software development company in the backup and recovery sphere that is both young and relatively popular, earning its reputation through hard work and excellent track record. Rubrik’s unusual approach of combining hardware and software allows it to create backup and recovery systems with a practically unprecedented level of efficiency and security.
Customer ratings:
- Capterra – 4.7/5 stars based on 45 customer reviews
- TrustRadius – 9.1/10 stars based on 198 customer reviews
- G2 – 4.6/5 stars based on 59 customer reviews
Advantages:
- Rubrik is well-known for its extremely serious approach to data protection, offering a variety of features in this department, such as ransomware scanning, data encryption, and more
- Another important advantage of Rubrik is its support for a multitude of different storage types it can create backups of, including applications, databases, VMs, and so on
- This kind of variety in terms of the feature set is also not acting as a detriment to Rubrik’s performance – it remains surprisingly fast, even when compared with other enterprise-grade backup solutions
Shortcomings:
- The combination of speed and versatility does come at a cost – quite literally, in fact, since this solution is rather expensive and can mostly be afforded by middle-sized or large companies
- There are still some feature gaps that Rubrik has to work on, such as its very basic RBAC feature
- Additionally, Rubrik also suffers from a rather popular issue on this market – the lack of detailed reporting, which makes it a lot more difficult to perform diagnosis and solve issues as a whole
Pricing:
- Rubrik’s pricing information is not publicly available on their official website and the only way to obtain such information is by contacting the company directly for a personalized demo or one of the guided tours.
- The unofficial information states that there are several different hardware appliances that Rubrik can offer, such as:
- Rubrik R334 Node – from $100,000 for a 3-node with 8-Core Intel processes, 36 TB of storage, etc.
- Rubrik R344 Node – from $200,000 for a 4-node with similar parameters to R334, 48 TB of storage, etc.
- Rubrik R500 Series Node – from $115,000 for a 4-node with Intel 8-Core processors, 8×16 DIMM memory, etc.
My personal opinion on Rubrik:
Rubrik as a software company hasn’t been on this market for that long by now, but it is already one of the better offerings in terms of enterprise-grade data protection capabilities. It supports a multitude of different storage variations, can provide a number of data protection features, and is generally an extremely fast platform. At the same time, Rubrik’s RBAC capabilities are very limited, its reporting is very simple and may lack important details – and the high overall price does not help matters at all, either. There have been some reports of difficulty in backing up VMs, and the solution still has some ways to go in terms of maturity.
NetApp Cloud Volumes ONTAP
As you may have seen, a lot of backup systems tend to try and work with the existing Azure Backup functionality. NetApp follows a slightly different path, offering its own take on a backup system that claims to work better and cost less than Azure Backup. It can work with Hyper-V and VMware instances within Azure, perform cloud-to-cloud backups, offer a secondary backup, and more.
NetApp Cloud Volumes ONTAP can be acquired in a single-node configuration or in a “High Availability” configuration. It is an excellent enterprise-grade cloud storage management platform that combines data management with data security in a single package. It can perform disaster recovery, create archives of DevOps databases, and supports NAS, SAN, and more.
Customer ratings:
- Capterra – 4.0/5 stars based on 3 customer reviews
- TrustRadius – 8.3/10 stars based on 14 customer reviews
- G2 – 4.5/5 stars based on 32 customer reviews
Advantages:
- NetApp ensures proper business continuity with versatile disaster recovery features, built-in data replication, as well as snapshot creation
- The solution can perform data tiering, data compression, data deduplication, and there are plenty of other features to work with, as well
- A part of NetApp’s data management efforts is represented in its capability to easily integrate with a variety of popular cloud storage providers for easier information management in multi-cloud or hybrid deployments
Shortcomings:
- NetApp’s solution is not particularly user-friendly, and some of the less experienced users may be confused by the number of different features and the interface as a whole
- Some solutions on this market are relatively easy to set up initially – but NetApp is not one of those solutions, and its first-time setup process can be a bit confusing in some places
Pricing:
- NetApp has little to no pricing information available on the official website, the only way to obtain such information is to contact the company directly and request a personalized quote.
My personal opinion on NetApp Cloud Volumes ONTAP:
NetApp Cloud Volumes ONTAP is another unusual solution built primarily for cloud-based apps and data. It is a cloud storage management platform at its core, offering business continuity, a variety of integrations, and a host of features aimed primarily towards data backups – including immutability, deduplication, data tiering, and more. Unfortunately, NetApp’s solution is also rather difficult to set up originally, and its interface may confuse a lot of newcomers with not enough technical experience. Reporting is limited.
Datto Continuity
Although discussed as a backup solution in this use-case, Datto Continuity is a solution that focuses more on disaster recovery and business continuity. It is on the list of Azure backup solutions due to its alternative capabilities in terms of Azure VM backups – securing processes and information, rather than storing actual data. It works by pulling copies of Azure data to its own servers on a regular basis, providing its users with the ability to restore any process that suffers an error or loses its data, improving overall business continuity.
Datto Continuity is a free integration for Datto Remote Monitoring and Management (RMM) – a cloud-based management and monitoring platform that works on managing endpoints remotely in order to improve efficiency and reduce costs. It puts a lot of emphasis on security while also being relatively easy to work with, offering a centralized management console with all kinds of useful data.
Customer ratings:
- TrustRadius – 6.8/10 stars based on 8 customer reviews
- G2 – 4.7/5 stars based on 11 customer reviews
Key features:
- Centralized dashboard with critical information management features
- Remote access to various server management operations, including configuration, backup process, recovery process, and more
- Backup status transparency for better visibility, complete with a variety of backup-related information
- Deployable Windows agents for easier control over a bigger pool of devices from one place
Pricing:
- There is no official information about Datto software’s pricing on Datto website, the only way to receive this kind of information is to request a personalized quote from the company itself
My personal opinion on Datto:
Datto Continuity works as a free integration to Datto’s flagship software – Datto RMM (Remote Monitoring and Management). Datto Continuity specifically is a business continuity and disaster recovery solution first and foremost, it copies existing Azure data to its own servers on a regular basis in order to act as an additional backup storage in case the business needs it. This particular feature set extends the original’s capability to control and manage endpoints remotely, offering an unusual feature set to its clients. However, its backups have been criticized as unreliable and technical support leaves something to be desired.
Bacula Enterprise

This is a high-end, highly scalable backup solution that is designed for medium and large enterprises, where a high level of dependability and security is required. As such, it offers support for many different storage locations and services, including of course Azure. You can use it to manage multiple accounts, work with other cloud storage providers, develop an advanced hybrid cloud strategy, and deploy special configurations that enable cached, speeded up restore of specific files, application and other data – making it a great Azure backup on premise solution. Bacula also backs up Azure VM’S, has tiers support, and offers some of the highest security levels in the industry.
Customer ratings:
- TrustRadius – 9.7/10 stars based on 54 customer reviews
- G2 – 4.7/5 stars based on 56 customer reviews
Advantages:
- Bacula offers an especially high level of security compared to nearly all of the vendors mentioned here. As such, it is relied on by the largest military organizations in the West.
- A combination of versatility and speed in a single solution, offering a wealth of features while also having a great performance across the board
- Can work with a particularly broad range of VMs, databases, physical storage, cloud storage, containers, and many other storage types
- Bacula Systems offers a pricing model that is not based on data volumes whatsoever, making the software in question a lot less expensive for large enterprises
- There are two different ways to access and control Bacula Enterprise – a web-based GUI, which is more user-friendly but potentially less versatile, and a command line, an extremely professional approach to backup and recovery tasks for the most dedicated professionals
Shortcomings:
- Bacula Enterprise’s update cycles are rather small, which is generally a positive notion, because it brings various feature and security updates that much faster, but update procedures are what some users may find inconvenient or annoying
- Most of Bacula Enterprise’s modules and features are included in the base package – but there is also a selection of features that have to be purchased separately, which may be seen as either economically convenient or problematic for potential customers
- The wealth of features that Bacula Enterprise provides does come at a price – its web-based interface can be quite difficult and overwhelming at times, although a new version of the GUI seems to be on its way to release at some point in the near future
Pricing:
- While Bacula does not offer its pricing information on the official website, there is information about how the pricing model itself works.
- Bacula uses a subscription-based model that can only be paid for a year in advance. A year of subscription includes unlimited technical support, all of the patches and upgrades, and the subscription tier is mostly determined by the number of machines (“agents”) that the software would be covering.
- Bacula claims to have a very competitive pricing and there are six different pricing tiers to choose from:
- “Small Business Edition” is limited to 20 agents and only includes the bare minimum of Bacula’s capabilities, such as web support, web interface, and the ability to purchase several plugins – deduplication, SAP HANA, etc.
- “Standard” is limited to 50 agents and introduces maximum response times based on the severity of the issue (there are four different levels of severity, with #1 being the highest one) – 1 day for #1, 2 days for #2, and so on
- “Bronze” supports up to 200 agents, includes phone support, and lessens the time necessary for the customer support to answer to severity #1-2 errors
- “Silver” works well below 500 agents, lowers the time for all severity levels across the board and includes the deduplication plugin free of charge
- “Gold” supports up to 2,000 users, responds to severity #1-2 errors within 1 and 2 hours, respectively, while also having the ability to purchase the PostgreSQL catalog support module
- “Platinum” is limited to 5,000 users, includes 1 training seat per year, and is not that different from the “Gold” level aside from the aforementioned differences
My personal opinion on Bacula Enterprise:
There may be a bit of a bias involved with this particular option, but I believe that Bacula Enterprise is one of the best enterprise-grade backup and recovery solutions on the market – with an extensive feature set, a clever module-based system, huge scalability/flexibility, and a pricing model that is not dependent on data volumes whatsoever. There may be features and nuances that may be inconvenient to some users, such as the complex web-based GUI, but they are not significant enough to be a serious detriment to Bacula Enterprise’s capabilities and especially high security levels.
Bacula Enterprise Cloud Plugin is something that we are going to look into in a bit more detail.
Bacula Enterprise and Azure
The Bacula Enterprise Cloud Plugin for Azure has been designed to help take advantage of cloud storage while helping mitigate some of the traditional disadvantages of backing up large amounts of data to the cloud.
The Bacula Enterprise Cloud Plugin for Azure allows a Bacula Storage Daemon to write directly to Azure storage. If you’re not familiar with the Bacula Enterprise Architecture, please see the architecture overview here: Once configured, https://www.youtube.com/watch?v=EXTo2Hj8RU8 the Azure storage blob becomes part of your Bacula Enterprise storage and can be used by any backup job. Bacula also uses a local cache, configurable to whatever size is desired, which helps optimize upload and storage usage so that data can be recovered with minimal access fees from the cloud provider. In addition, the cache can be configured to act as a first line restore point for your most recent backups, allowing for fast recovery of the data before it is moved to the cloud on your schedule. The caching feature helps us to overcome some of the concerns associated with cloud backup and to give the administrator the most control over their storage.
Now let’s move on to the configuration ‘how to’ for both your Azure portal and Bacula Enterprise.
Azure portal configuration How-to (with screenshots)
1. Log into your Azure portal, click “Resource Groups” and then click “+Add” to create a new Resource Group.

2. In the Microsoft Azure Dashboard, in the far left menu, click “Storage accounts”.
3. After clicking on “Storage accounts” click the “+Add” button in the upper part of the window to add a new BlobStorage.

4. Give it a name; Must be lowercase letters and numbers only, and must be unique in all of Azure In the “Account kind” field select “Blob storage” For “Resource Group”, click “Use existing”, then choose the Resource Group from the drop-down Click on “Create” to save. This may take a minute to deploy. If you didn’t create a Resource Group in the beginning, you can also create a new one on the fly in this step of the Azure preparation.
5. In the far left menu, click on “Storage accounts”.
6. Click on the newly created BlobStorage Account.
7. Click “Settings –> Access keys” and here you find the “Storage account Name” which is what use for the “AccessKey” directive in the Bacula Cloud resource.
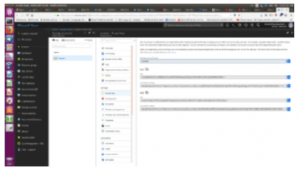
8. Under the “Key1” bold heading, the “Key” listed here is the “SecretKey” that we use in the Bacula Cloud resource.
9. This step is not 100% necessary, Bacula will create a Blob Container if it does not exist. Click on BLOB SERVICE –> Containers, click the “+Container” at the top to create the new container. This will be the “BucketName” that we use in the Bacula Cloud resource. Give it a name, and select “Blog” for the “Public access level” drop-down. Click “OK” to create this new BlobContainer.

10. Confirm that the Settings in the Azure portal which were just created/edited match the Bacula Cloud resource config file (which we will create in the next part of this tutorial, see below).
Configuration of Bacula Enterprise
Once the Azure side has been prepared you will need to create a few new Bacula resources in your configuration files. We will need a Storage{} resource (or Autochanger{}) on the Bacula Director to point to our Azure storage that we are going to create on the Bacula Storage Daemon:
Name = “Azure-storage”
Address = “bacula-storagedaemon.yourdomain.org”
SDPort = 9103
Password = “xxxxxxxxxxxxxxxxxx”
Device = “Azure-CloudDevice”
Media Type = “AzureVolume”
Maximum Concurrent Jobs = 10
}
and on the Storage Daemon we will configure a new Device{} resource (or an Autochanger{} resource with more than one device) and the Cloud{} resource that will point to your Azure cloud storage target. The Cloud{} resource is available with the Cloud Plugin for Azure for Bacula Enterprise.
This is what the Storage Daemon configuration resources look like in our example configuration:
Name = “Azure-device”
DeviceType = “Cloud”
Cloud = “Azure-cloud”
Media Type = “AzureVolume”
Archive Device = “/opt/bacula/volumes/azure”
LabelMedia = “Yes”
Random Access = “Yes”
AutomaticMount = “Yes”
RemovableMedia = “No”
AlwaysOpen = “No”
Maximum Concurrent Jobs = 5
}
Cloud {
Name = “Azure-cloud”
Driver = “Azure”
Hostname = “dummy – not used for Azure”
BucketName = “bsyscontainer”
Accesskey = “bsystest”
Secretkey =
“xnligNkNEUpFKLvGP8g9itZujF4ssjZMl9Ya9XE53qqy3a0zhgjxzhIH5N19XKhLcpfifnUkQW258MzCKEBA==”
Protocol = “https”
UriStyle = “Path”
Upload = “EachPart”
}
Final touches
On the Bacula Director a “reload” of the configuration will be sufficient once you have tested the configuration syntax with the “-t” option of the bacula-dir service (test syntax option).
On the Storage Daemon, you will have to restart the daemon (see below). Please make sure that no backup jobs are running on the Storage Daemon at the time of the restart of this service:
Stop the bacula-sd daemon:
# systemctl stop bacula-sd
Test the SD config syntax:
# /opt/bacula/bin/bacula-sd -u bacula -t
Start the bacula-sd daemon:
# systemctl start bacula-sd
Now you are ready to go and do backups to your Azure storage in the cloud. Just create a new backup job, or modify one of your existing backup jobs to use the new Cloud Storage/Autochanger instead of local disk or tape storage targets. The restore process will recover your data from the cloud transparently onto any Bacula File Daemon (client) that is available to the director.
Conclusion
Creating a backup of an Azure environment can be a simple or a complicated process, depending on which particular approach the end user takes. This same task can be performed using either the built-in Azure Backup solution or one of many third-party cloud solutions.
The Azure Backup method has its own drawbacks and it is recommended to use third-party solutions when possible. However, it can be quite difficult to choose a single solution for this purpose since the market itself is vast, varied, and tends to use methods that differ from one another quite a lot. This article went over all kinds of solutions for Azure backup purposes, ranging from all-purpose enterprise-grade solutions (Acronis Cyber Protect, NAKIVO Backup & Replication) to software built specifically for cloud backup, such as Datto Continuity or NetApp Cloud Volumes ONTAP.
Bacula Enterprise can also be used for Microsoft Azure backup purposes, as well as plenty of other features – regular backups, VM support, database support, app-aware backups, and so on. It is a great solution with plenty of use cases that is sure to satisfy a lot of different clients’ needs.
Why you can trust us
Bacula Systems is all about accuracy and consistency, our materials always try to provide the most objective point of view on different technologies, products, and companies. In our reviews, we use many different methods such as product info and expert insights to generate the most informative content possible.
Our materials offer all kinds of factors about every single solution presented, be it feature sets, pricing, customer reviews, etc. Bacula’s product strategy is overlooked and controlled by Jorge Gea – the CTO at Bacula Systems of Bacula Systems, and Rob Morrison – the Marketing Director of Bacula Systems.
Before joining Bacula Systems, Jorge was for many years the CTO of Whitebearsolutions SL, where he led the Backup and Storage area and the WBSAirback solution. Jorge now provides leadership and guidance in current technological trends, technical skills, processes, methodologies and tools for the rapid and exciting development of Bacula products. Responsible for the product roadmap, Jorge is actively involved in the architecture, engineering and development process of Bacula components. Jorge holds a Bachelor degree in computer science engineering from the University of Alicante, a Doctorate in computation technologies and a Master Degree in network administration.
Rob started his IT marketing career with Silicon Graphics in Switzerland, performing strongly in various marketing management roles for almost 10 years. In the next 10 years, Rob also held various marketing management positions in JBoss, Red Hat, and Pentaho ensuring market share growth for these well-known companies. He is a graduate of Plymouth University and holds an Honours Digital Media and Communications degree, and completed an Overseas Studies Program.


